|
|
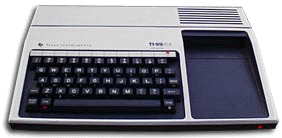
Connecting the SVD to the TI99/4a is very straight forward.
There are a couple of requirements and issues that you need to check-out first:
- To use the SVD you need the Peripheral Expansion System or Disk Drive Controller just like you
would with a real floppy disk drive.
- You need an appropriate 34-pin edge-card connector cable (more on this below).
- Depending upon if you want to have a real floppy drive along with the SVD,
you'll need to worry more about termination.
|
|
Simple SVD-only Connection
By far the easiest way to connect the SVD to the TI99/4a is to connect
it as the only external floppy. If you are using the Peripheral Expansion System,
you most likely will have an internal floppy installed.
1. |
Connect the Peripheral Expansion System or Disk Drive Controller
|
The expansion system and controller both plug into the expansion bay on the right
side of the TI99/4a. In the case of the expansion system, you will plug in the
cable connector, in the case of the controller, the entire unit plugs into the side
of the TI99/4a.

|
2. |
Plug in the Disk Manager (II)
|
If you have a Disk Manager (or Disk Manager II) cartridge, you
can plug that in to the front of the TI99/4a. NOTE
that the the cartridge isn't necessary to use
the SVD or floppy. However, it contains many programs that make
it easier to list the contents of the floppy or copy one floppy
to another. I highly recommend using it.
|
3. |
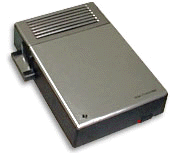
Use the Terminated SVD connector
|
Plug the terminated SVD connector into the
left-side 34-pin plug on the SVD. The terminated connector
is necessary since the SVD will be the only "floppy" connected
to the expansion system or the controller. In the case of the
exansion system, there will probably be another drive available,
but it will be connected to a different internal
connector other than the SVD.
For more information on termination, see the termination section in
Getting Started.
|
4. |
Connect the SVD to the expansion system or controller
|
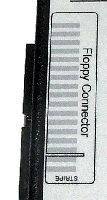
To do this, you need a straight-through 34-pin edge card connector cable.
Pay close attention to the orientation of the cable, ensuring that the
stripe for cable is on the correct side for both the controller cart and
the SVD. The SVD is clearly marked with the location of the "stripe".
However, the best indication of the right orientation is the notch that
is taken out of the edge-card connector for both the SVD and the
controller. Make sure these line up!
Odd Notch
Note that the edge-card connector at the back
of the Expansion Chassis for the TI99/4a is just
a bit odd.
Although it is a 34-conductor cable with the same
pin-out as the "standard" floppy interface for the
vintage, it has a notch in an odd place.
Normally the notch is between pins 3 and 5. But the
notch for the TI99/4a controller is between pins 9 and
11.
This is not fatal. If you don't have the special edge-card connector
with the polarizing plastic key in the right spot, then just remove the key to make it work,
or use a connector without a key.
HOWEVER, be sure that you align the stripe on the floppy cable closest
to the connector side with the notch.
|
|
|
|
|
Booting from the SVD
Unlike many vintage computers (but like the TRS-80 CoCo), the TI99/4 doesn't read the operating system (OS)
from floppy when "booting." The OS is contained in the disk controller cartridge
as described above. This makes booting very easy.
So, there is nothing special you have to do to boot from the SVD.
Just plug the disk controller cartridge in, turn on the TI99/4a and it
boots. See below for an example.
Sample Directory Listing
Running a Program
Copying a Floppy
Other Things
|
 | support for v9t9, TIDisk, and pc99 disk image formats
|
| requires a floppy controller either in the Peripheral Expansion System or the Disk Drive Controller
|
| supports commands from the Disk Manager (and Disk Manager II)
|
| reading the diskette image
|
| writing the diskette image
|
 | formatting the diskette image
|
 | downloading individual files - downloading individual BASIC programs or command files
|
| single sided double & single density
|
| double sided - this will be supported with the SVD II to be release late 2005
|
| |
| www.99er.net | - A poplular place for TI99 images and information. |
| ftp://ftp.whtech.com | - There are MANY disk images here of all types.
Note, however, that they are named in many different
ways and you may need to rename them to get them to
work with the SVD. |
| File Extension | Common Machine | Description
| | .v9t9 |
TI99/4a |
This format is also known by .t99 and .tidisk.
It is a binary data format with contiguous sectors.
There is no header information and it is, therefore, impossible
to distinguish between DS SD and DD SS images looking only
at the size of the file.
These files are normally 40 tracks with 9 sectors and in single density.
| | .pc99 |
TI99/4a |
The .pc99 format is a raw dump of disk sector data
and includes sector header information.
| | .dsk |
TI99/4a |
Both .pc99 and .v9t9 formats can be named
a .dsk file.
This often raises issues because the SVD finds it hard to
distinguish between these file formats and many others.
When using these formats, it is wise to name with an extension of something
other than .dsk.
|
|
|
