|
|
SVD "Kit" Owners
If you purchased an SVD Kit, or even if you've created your own
PCB and programmed your own PIC, you should go to the
"Building an SVD" page.
From there you can download the manual for building the SVD
which includes parts layout and assembly instructions.
Once you have built the SVD, please proceed to step 2 where you
will get a quick overview of the important pieces of the SVD
and then be taken to the the section that will allow you to
check-out the SVD.
Your SVD Came Assembled
So you've got it easy! Please proceed to step 2 where you
will get a quick overview of the important pieces of the SVD
and then be taken to the the section that will allow you to
check-out the SVD.
|
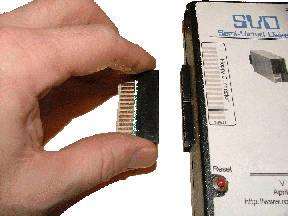
Both the assembled SVD and the kit come with 2 very important parts: the floppy connectors.
Each floppy connector plugs into the 34-pin socket on the left side of the SVD ------>.
It is extremely important that you only use the two connectors that came with the SVD.
They are configured to allow the SVD to appropriately talk to the floppy controller on your vintage
machine. If you don't use them you may cause damage to either the SVD or your vintage machine.
BIG NOTE - you DON'T have to use one of the floppy
connectors when using the Apple dongle. It has the terminator built in!
|  |
| Floppy Connector Secrets |
There are two important attributes of the SVD floppy connectors:
- The first is that they
are "keyed." If you look at the "plug-end" of the connector, you'll see that the middle hole
has been filled in. This ensures that you'll get them oriented correctly.
- The second attribute is that pin 34 coming from the SVD has +5v connected to it. This power
is used to terminate the floppy bus, or power additional features like the Apple ][ connector.
The floppy connectors do NOT pass this +5v onto the floppy cable. Note, however, that pin 34
is normally an unused
pin on the floppy cable.
|
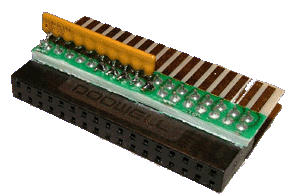
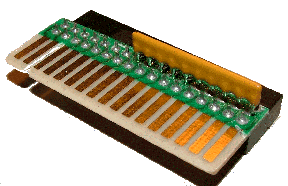
Terminated Connector
The "terminated" connector includes a terminating resistor pack on its underside.
This connector is used when a "real" floppy is not being used in addition to the SVD, or if the real floppy doesn't have termination. Normally, use the straight-through connector (below) first and see if that works. If not, try the terminated connector. |
 |
 |
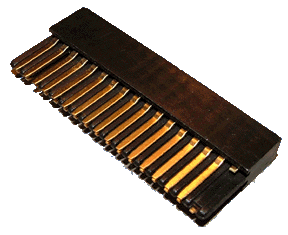
UN-Terminated Connector
(or "straight-through" connector)
The "straight-through" connector is used in situations where the SVD is being used in addition to other "real" floppy drives. These drives often include bus termination. When working with the SVD, unless you know otherwise, always start with the straight-through connector to see if it works. If not, try the terminated connector (above).
| Note that the unterminated floppy connector may look like the
one in this picture, or may look like the terminated floppy
connector without the resistor pack. The
distinquishing feature between the two types of connectors is the resistor pack.
|
|  |
 |
Before using the SVD, you need to download the software that will
run on the PC. Please go to the
PC Software Page.
Here you will find the link to download the software
as well as instructions on how to use it.
Please get this software running on your PC before proceeding
to the next step.
|
Checking out the SVD does not require you to connect it
to your vintage machine...not yet. It simply requires that you
have the SVD PC Software running and that you connect the SVD
to your PC with an 9-pin RS232/serial cable.
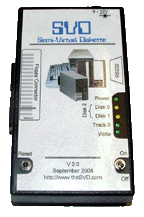 |
The serial cable connects to the right side of the SVD.
 |
 |
4 simple steps:
|
Now's where the fun starts! Once you have the SVD up and running, and working
with the PC software, all that is left to do is connect it to your vintage
computer.
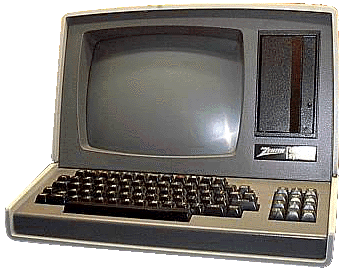 |
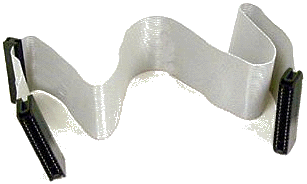
The floppy cable connects to the
left side of the SVD.
 |
 |
 |
This should be easy, but it isn't necessarily.
There are many different issues that you potentially
have to contend with when connecting the SVD to your vintage hardware.
To make things easier, each machine has it's own page devoted to helping
you connect the SVD to it. Please click on the appropriate link below
to go directly to specific instructions for each machine.
|
|
| | Each one of these sections includes a bunch of illustrations and screen shots so they may download a bit slowly on slow connections. |
For a single file, printable version version of these instructions, click here. Note that the file which next comes up will NOT have the menu on the left side, and may take a little while to load. |
|
|


